Configure Miva Merchant and Payment Gateways
This section provides instructions for:
 Using LinkPoint/Cardservice
with MivaMerchant
Using LinkPoint/Cardservice
with MivaMerchant
Using Authorize.Net with
MivaMerchant
Using VeriSign PaymentFlow
Pro (Payment Net) with MivaMerchant
Using LinkPoint/Cardservice with Miva Merchant
When you set up your merchant account with LinkPoint/Cardservice, you should have received an email from them that contains important information that you will need in order to configure Miva Merchant to work with your merchant account. Because you will need to copy your entire digital certificate from this email, you will need to have access to the electronic version of the email and not just a printed version of it.
|
|
If you have not yet opened your merchant account, you can order one directly from SiteControl. Select the Ecommerce module and then click Apply for a Merchant Account. |
To configure the
Miva Merchant software to use your LinkPoint/Cardservice merchant account:
-
Log in to the Miva Merchant administration page for your site:
- From SiteControl's Ecommerce module
- By typing http://www.[domainname.com]/Merchant2/admin.mv
-
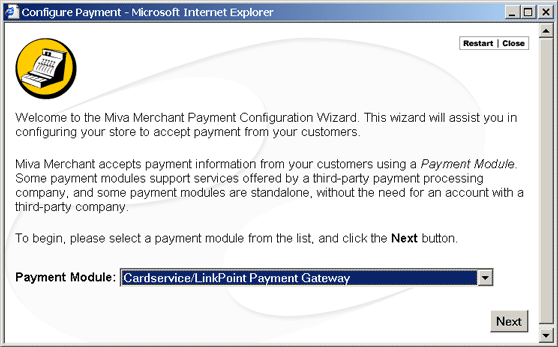
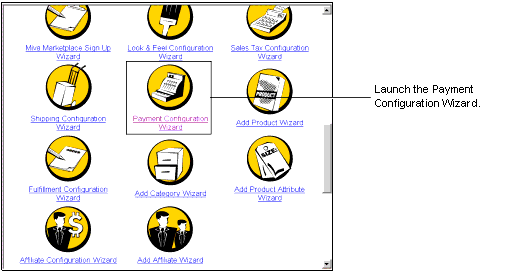
When the main window appears, scroll down and select the Payment Configuration Wizard.

-
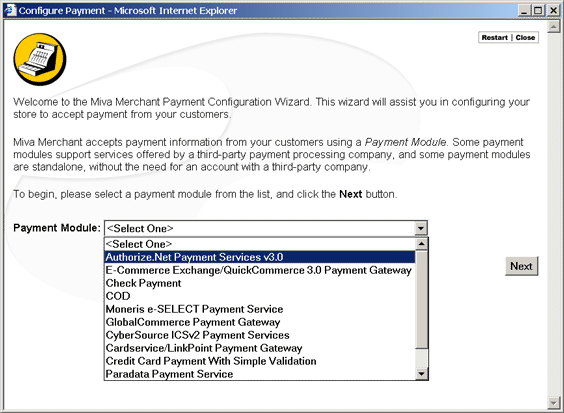
In the Configure Payment wizard, select Cardservice/LinkPoint Payment Gateway as the Payment Module.
-
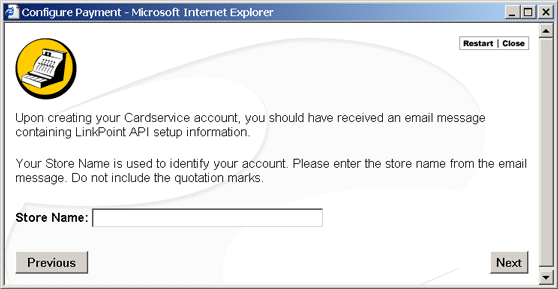
Click Next. The email you received includes a six digit number in quotation marks labeled "Your store Name is." Enter those digits in the Store Name field.
Click Next. The email you received also includes your digital certificate. Open the email message, copy the entire digital certificate and then paste it into the space provided.
-
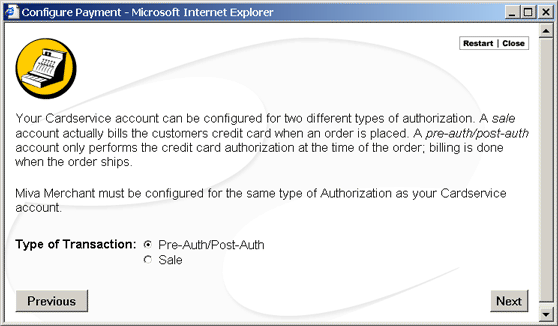
Click Next. Select the type of transactions you want to perform.
-
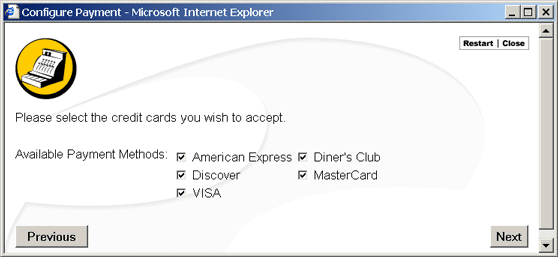
Click Next. Select the payment methods you want to support.
Click Next. A summary of your selections appears. Review this information and verify that it is correct. Then, click Finish.
Using Authorize.Net with Miva Merchant
|
|
If you have not yet opened your merchant account, you can order one directly from SiteControl. Select the Ecommerce module and then click Apply for a Merchant Account. |
To configure Miva Merchant to use your
Authorize.Net merchant account:
-
Log in to your Miva Merchant account:
- From SiteControl's Ecommerce section - By typing http://www.[domainname.com]/Merchant2/admin.mv
-
In the Configure Payment wizard, select the Payment Module field and select Authorize.Net Payment Services.
-
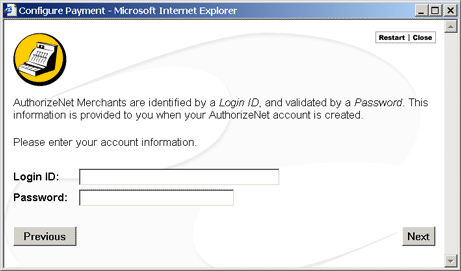
Click Next and then enter the Login ID and Password for your merchant account.
-
Click Next and then select your charge method.

-
Click Next and then select the different payment methods you want to accept.

-
Click Next. A summary of the information you have provided appears.

Verify that this information is correct and then click Finish.
Using VeriSign PaymentFlow Pro (PaymentNet)
|
|
If you have not yet opened your merchant account, you can order one directly from SiteControl. Select the Ecommerce module and then click Apply for a Merchant Account. |
To configure Miva Merchant to use your
VeriSign Payflow Pro (PaymentNet) merchant account:
-
Log in to the Miva Merchant administration page for your site:
- From SiteControl's Ecommerce module
- By typing http://www.[domainname.com]/Merchant2/admin.mv
-
When the main window appears, scroll down and select the Payment Configuration Wizard.
-
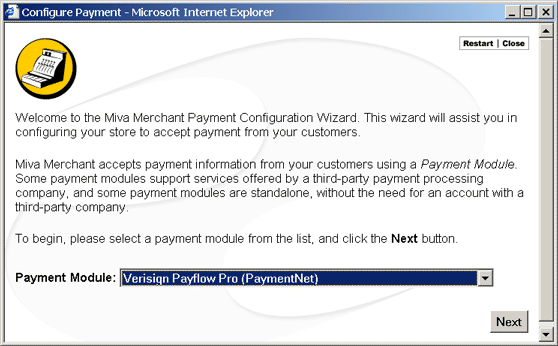
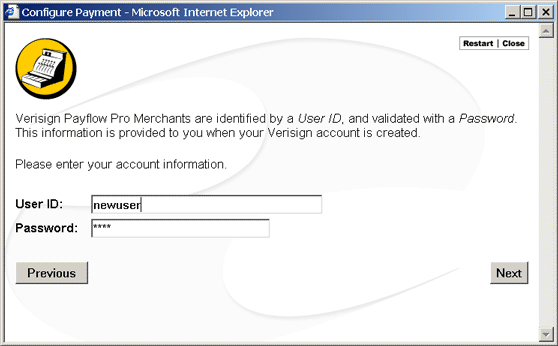
In the Configure Payment wizard, select VeriSign Payflow Pro (PaymentNet) as the Payment Module.
-
Click Next. Enter the User ID and password for your VeriSign account.
-
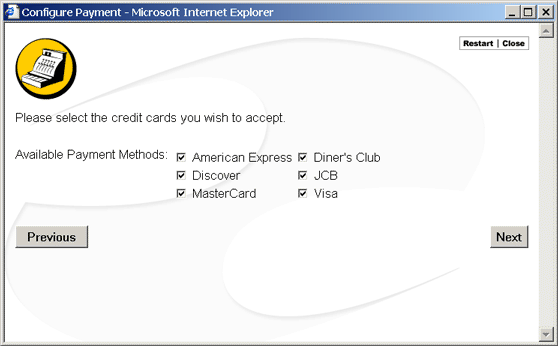
Click Next. Select the payment methods you want to support.
Click Next. A summary of the information you provided appears. Review this information and verify that it is correct. Then, click Finish.
